Now the hard part. Pulling all the wires to the wings, the tail, the sticks and to the engine compartment. I hope to be able to test it within a week.


Now the hard part. Pulling all the wires to the wings, the tail, the sticks and to the engine compartment. I hope to be able to test it within a week.
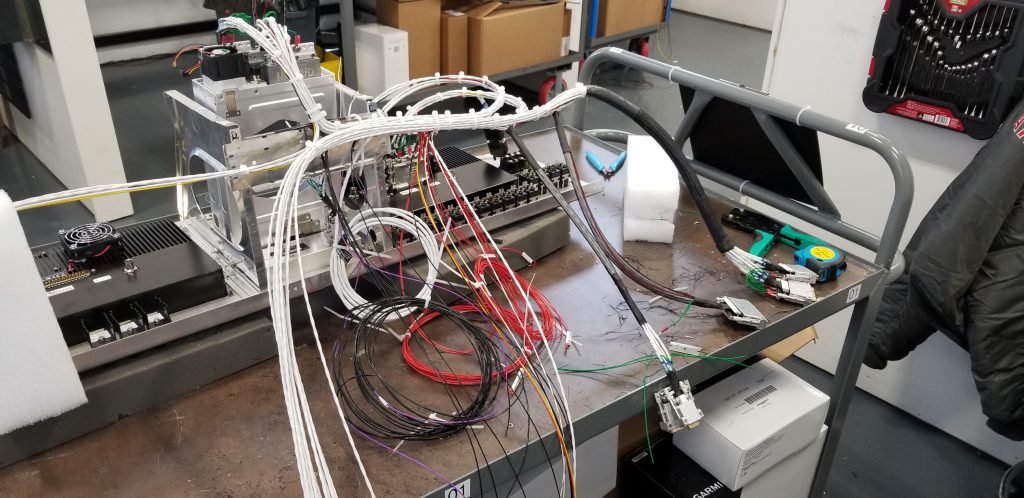
We’ve got most of the components in now. Last big one is the GTN-650xi. It has taken a few hours to get the mounting tray for it installed. The fit is tight and it will look bad if the bezel sticks out.
I will have to move the GDL51 because one of the connectors hits the back of the GDU. Exploring options now.
Still a lot of wire to be run including to the stick grips, wings and various antennas.
Got the EarthX battery today. Amazing how light it is. I knew it was light, but the box almost feels empty.


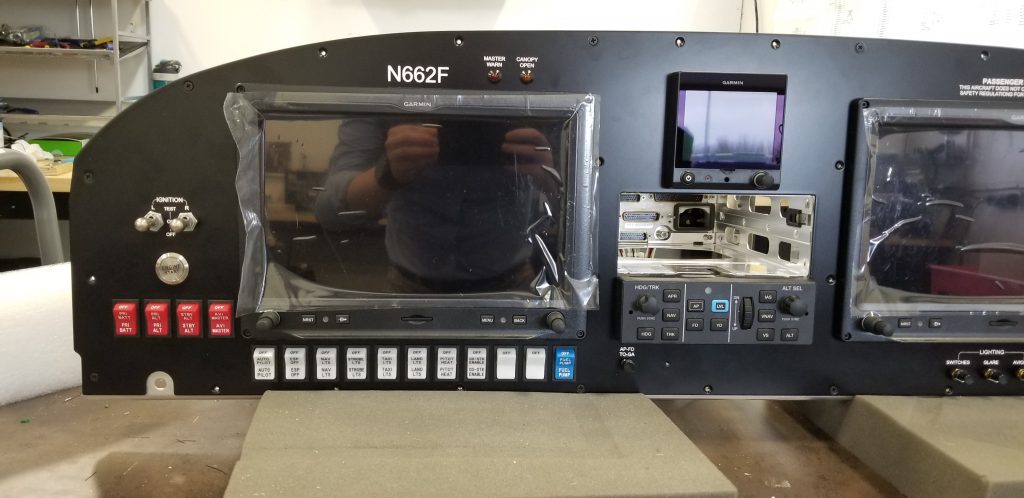
The panel from Stein is artwork! I began installing the remote components including the GAD 29, GMA245R and the GTR20. I hope to have all these plus the transponder, the GEA24 and the XM interface done by the weekend.
8 hours (2 people x 4 hours).


Finished painting the canopy frame and other miscellaneous parts. I still don’t completely understand the spray gun and the proper technique. Overall pretty happy with the result though. Probably a solid B for quality. The important thing is that I am no longer blocked from moving forward with the windshield install.
6 hours
It took me four tries to build a paint booth that I’m happy with. The key was using heavier (4mil) plastic. I used two exhaust fans and a single inlet vent. I also have a small electric space heater that can quickly raise the temperature in the booth to about the surface temperature of the sun.
Today’s goal is to paint more interior parts and the canopy frame. I need to get the frame painted so I can install the plexiglass windshield and rear window.
The biggest thing I’ve learned about painting is that the set up to paint takes 10x the time it actually takes to paint.
Meanwhile the panel should arrive on Wednesday. Jon thinks it will take a couple weeks to get the panel fully in. He is probably right, but I am hoping it is quicker than that since the engine should be arriving in three weeks or so (and I still have to glue the canopy).


3 hours (not including the drying time)
Jon and I painted sone of the access panels. They came out pretty good. Some minor contamination (dust) and the paint needed to be reduced a little more but quite happy with the result.
We also began prepping the rear window for Sikaflex (glue). Jon took measurements for the engine grounding strap.
I ordered the new firewall forward hose package from Aviation Specialty. Steve gave me full credit for the slightly older hoses I bought toward the new ones with integrated fire sleeve. The hoses are beautiful.
The engine looks to be three weeks out and the instrument panel is two weeks away.
Twelve hours (2 people x 6 hours)

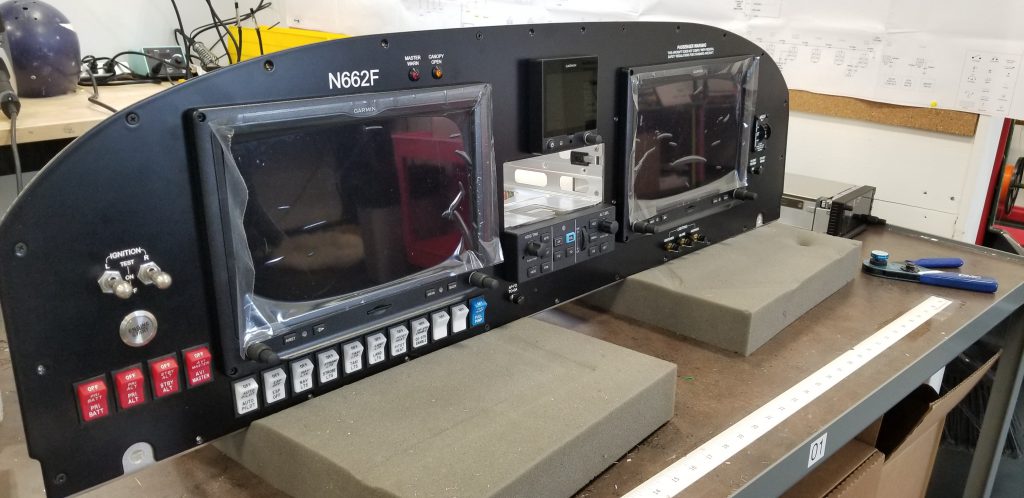
Josh at SteinAir sent me pictures of my panel. He is estimating that it will be ready to ship by the last week of April.
We worked on the two small offsets that are used to attach the wheel pant to the nose gear fork. The plans call for cutting these from solid blocks of aluminum. Much harder to do than you might think. The bandsaw struggled to cut through the blocks. I probably need to get another band saw blade.
Van’s sent an e-mail asking for the rest of the money for the engine. This means it should be here in the next 30 days. Woo hoo!
2 hours (2 people x 1 hour)
Dad and I did some cutting, sanding and fitting on the nose wheel pant last night. It looks pretty good. It’s clear that the instructions were lifted from an older plane design because they have several steps that are largely unnecessary (again thanks to the high quality of the RV-14A kit).
We also did the alumi-prep and alodine processes on several more pieces that we will be using soon.
The paint booth is delayed by a few more days. The fans I ordered on Amazon were supposed to arrive yesterday, but now look like they will get here on Sunday. Not a big deal since we have other small tasks we can work on.
Lycoming says they are starting assembly of the engine. My best guess is that it will be ready to ship by early to mid May.
2 hours (2 people x 1 hour)